Top on working with LOT-EK
In terms of materials, it was like shopping at the supermarket. First, they said they would be in charge of poultry and I would be in charge of vegetables and we would meet at the checkout fifteen minutes later. As agreed, we met at the checkout; LOT-EK took one look in my cart and asked, Why have you only picked cucumbers? I replied, Because cucumbers are the only thing I like to eat. Right there and then we had a problem. Our solution was to walk down every aisle together; we even visited the pet aisle although none of us has a pet.
In terms of ideas, it was like putting a jigsaw puzzle together without seeing the picture on the box. LOT-EK picked up a piece and saw a map, I picked up a piece and saw a country house. I picked up a piece and saw a country house. We stopped arguing and decided to finish the puzzle by using our differences, our instinct and our practicality. In the end, the puzzle was neither a country house nor a map. It was a cow.
Top on collaboration:
This project is not a 50/50 collaboration, and I am happy that it is not. If it had been, you would see an ugly tree house between the two red walls. We didn’t want people coming into our space and saying Top did this, LOT-EK did that, our knowing where LOT-EK starts and Top ends.
-Top Changtrakul
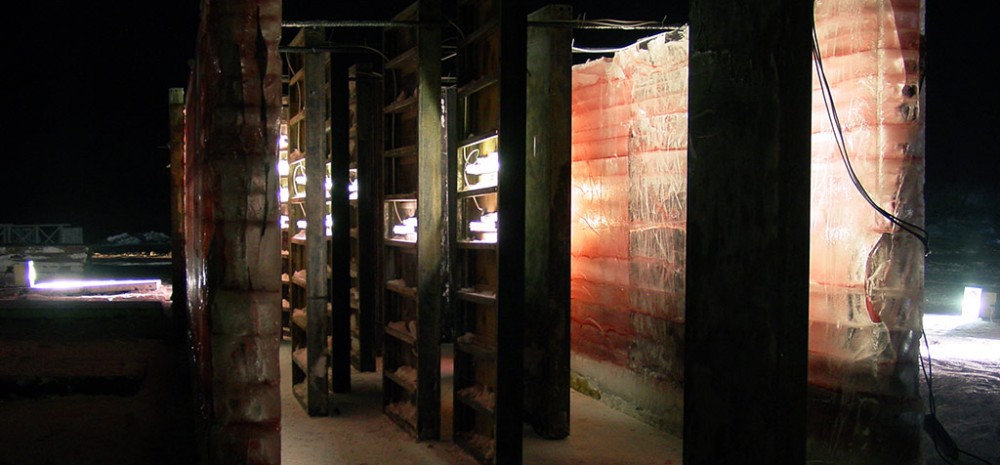
Ingredients: Water, purple dye, 120-x-270cm concrete forms, rebars (concrete reinforcing bars), fluorescent tubes.
Pick a very cold location (i.e. Lapland)
Clear up a piece of land about 35m x 10m
Build 2 parallel forms 25m long and 2.70m apart.
Wait until the temperature drops to about 27.
Mix water with just enough dye to give it the right color. Make enough moulds to create the finished forms. From the top of the mold, pour the water-dye mix in layers. Each layer should be approximately 30cm high. Make sure each layer is completely frozen before you pour the next one. When the top layer is reached, replace the rebars across the space between the walls.
Once it is completely frozen, take down the moulds. Do not remove the first pair of moulds at one end of the wall as they demonstrate the building process. Once the moulds are removed, use some of them to create a wandering path through the space between the walls.
Stand the moulds between the walls, attaching them to the ground and the upper rebars.
Beginning at one end, place the moulds parallel to the walls and start turning them randomly until they are perpendicular to the walls.
Attach fluorescent tubes to some of the moulds.
Turn the lights on. Enjoy the space within the walls and the purple glare without.
-LOT-EK